Training to Scan and Glance with Restricted Visual Fields or Central Scotoma and Reduced Acuity
by Dona Sauerburger, COMS
This page outlines some suggestions for training people to scan with severely restricted visual fields, and to look for vehicles when crossing streets with central scotoma and/or reduced acuity as well as restricted visual fields.
Scanning with Restricted Visual Fields (less than 10-15 degrees)
People with visual fields restricted to about 5-10 degrees of central vision usually need to learn to:
scan systematically, to avoid missing any areas;
scan slowly because even if they cover every area with their systematic scanning, they'll miss seeing objects if they do it too fast.
Who needs this training?
This training is usually necessary only for people whose visual fields are smaller than about 10-15 degrees.
People with larger visual fields are usually able to scan and glance effectively the same as they did before the visual field was so restricted.
Regardless of the size of the students' visual field, it is essential that their ability to scan and look for vehicles be assessed during their training for street crossings.
Considerations of restricted visual fields
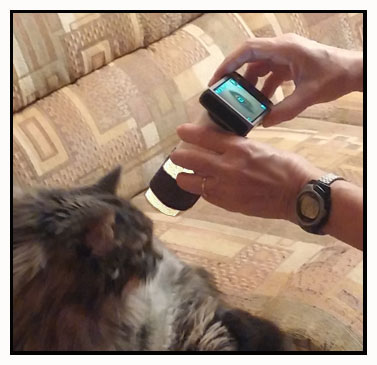
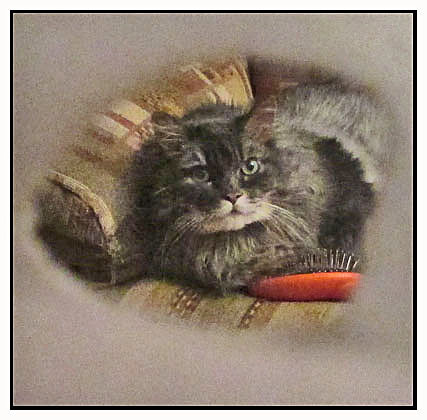
Before starting the training, it is important to realize that the further that people with restricted visual fields are from an object, the more of it they can see.
This is illustrated with 4 pictures that I took at various distances from my cat and his orange brush.
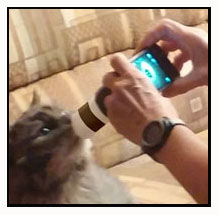
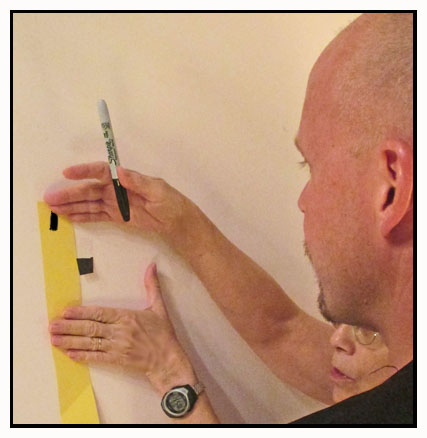
I used a camera (shown to the right) with a tube attached in front of the lens to simulate a restricted visual field.
The first photo below was taken very close and all we can see is the cat's face -- if we had wanted to see the brush, we'd have to scan around and find it.
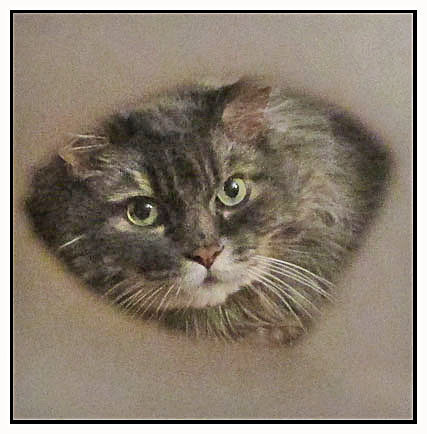
Each successive photo was taken from further away and we can see more and more of the cat and his surroundings.
The last picture was taken from across the room, and we can see the cat and the brush and the couch around them.
That means the closer they are to the area they are scanning, the more challenging it will be for them to find things.
They can see vehicles in the distance but may miss the ones nearby in what I call the "blind spot" (as illustrated in the fourth scene in the video to the right and explained below).
When looking for something on a desk, they may find it more easily by standing up and stepping away from the desk.
So to make the scanning tasks more challenging, position students close to the area where the scanning area and targets are --
if they are further away, they may be able to find the targets without even scanning.
To make the tasks easier for students with a very small visual field, position them further from the scanning area.
Initial Training to Scan
This training (as seen from the perspective of the student with the restricted visual field) is demonstrated in the video to the left.
The demonstration is on a brick wall, which is not recommended because the prominent lines make it too easy for the student to scan horizontally / vertically, as you can see in the video simulations.
However this may be desirable in the early stage of training for students who struggle with scanning -- once they become more skilled, you can either move to a smooth wall or cover up the brick with paper or material.
The training usually takes less than half an hour.
Materials:
Wall or board which is at least 3 feet by 3 feet and which has no lines or visual clutter (if it is a board, mount it to the wall or whatever surface will be used for the training);
Tape which will not damage the wall or board;
Two strips of paper an inch or two wide and about two feet long;
Pen or marker thick enough to draw lines that can be easily seen by the student from a few feet away;
Small targets (can be objects or pieces of paper or material) about an inch square which can be affixed to the surface of the wall or board.
You may want targets with a range of contrasts with the background, from targets with high contrast to targets that differ from the background only in texture.
Procedure:
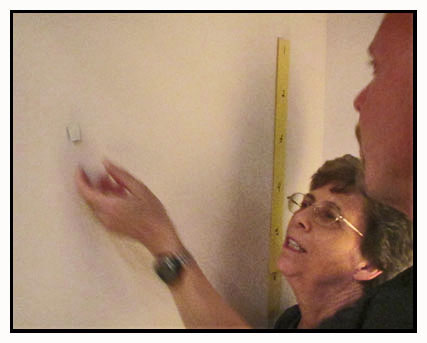
Place a target on the wall or board and find out how large an area the students can see at the distance they are from the target (as explained above, this area becomes larger when they move further from the wall or board).
Ask them to look at a target while you move one of your hands slowly toward the target and tell you when they see your hand.
When they report seeing your hand, make note of where the edge of their visual field is in that direction, and do it again from another direction until you have outlined their visual field around the target.
Measure the height of the visual field, and then write consecutive numbers along both strips of paper, with the numbers spaced apart the same distance as the height of the visual field.
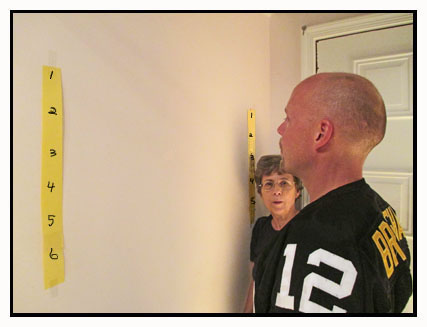
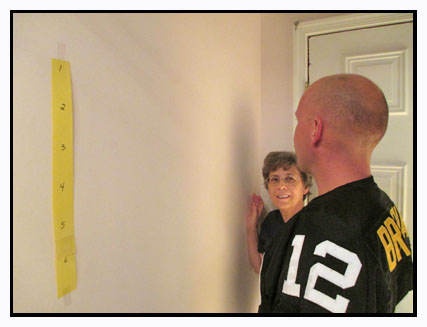
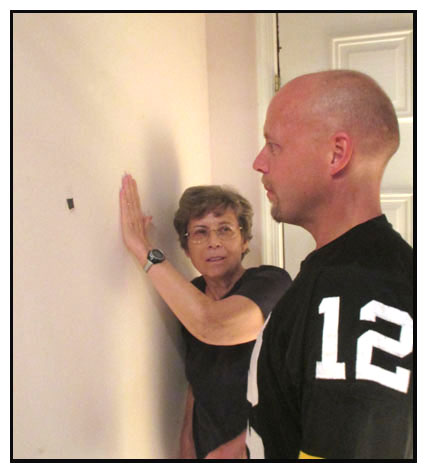
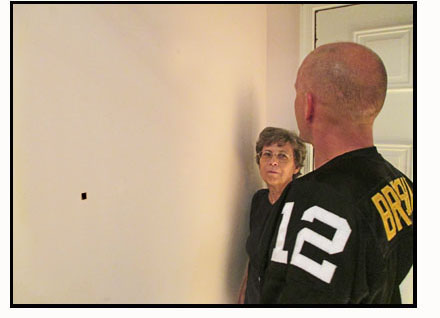
Tape the strips to the wall, one on each side of the scanning area as shown in the photos below.
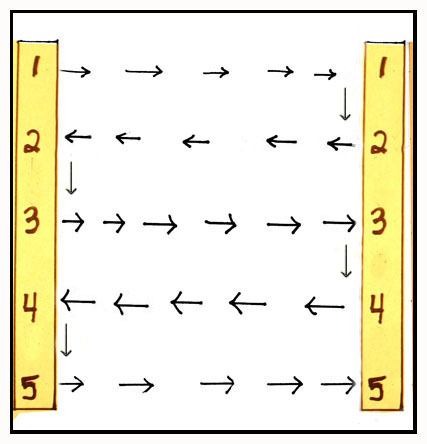
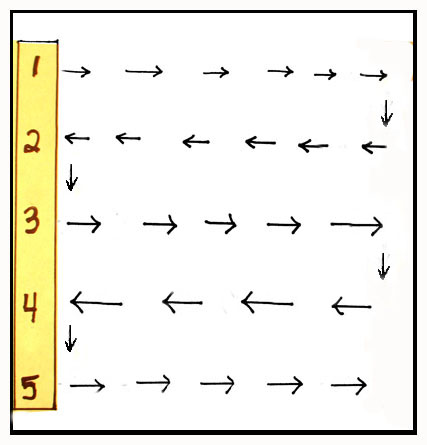
Students then scan horizontally from the first number on the top of one strip to the strip on the other side of the scanning area.
If they scan correctly, when they reach the other strip they will see the same number as the one they started out with on the first strip.
If they start at a number on the first strip and end up above or below that number on the second strip, they were not scanning horizontally -- have them try again.
Once they reach the second strip, they scan down till they are looking at the next number on the second strip, and then start scanning horizontally back to the first strip.
By looking down to the next number before starting to scan back, they will be scanning just below their previous scan, covering new areas without missing anything.
When they reach the first strip, they should see the same number as the one they started from on the other strip.
They continue in this manner, following a grid pattern like the one illustrated to the right.
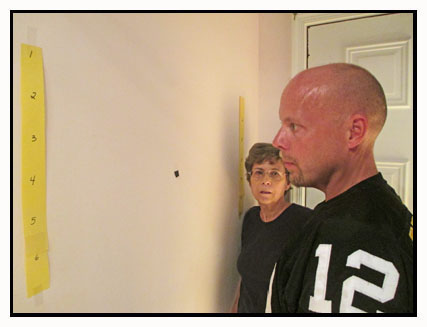
When they can scan systematically well with the assistance of the numbered strips, remove one of the strips and have them scan again, as shown in the photo to the right.
They will start at the top number on the remaining strip and scan horizontally to the other side, then look down
exactly far enough to start their scan back to see the area just below their first scan.
If they do that correctly, they will reach the next number on the original strip.
They then look down again to the next number and repeat their scan across, down and back again, following the grid pattern that is illustrated to the far right.
Each time they return to the strip, they check to see if they arrived at the next number -- if not, they need to figure out if they were not scanning horizontally or if they scanned down too far or not far enough before scanning back to the strip.
Once they can scan systematically without missing any areas, they are ready to learn to scan slowly enough to see targets in that area.
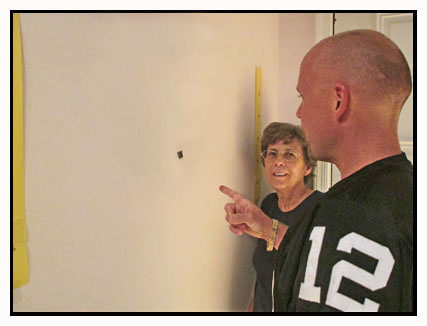
Start with a target that is easy to see (high contrast such as the target in the first two photos below, and/or large with bright colors).
Later introduce targets that are harder to see, such as the one with low contrast in the pictures to the right below.
If you keep the strips up for this exercise, it can help the students make sure they are still scanning systematically while they focus on scanning slowly.
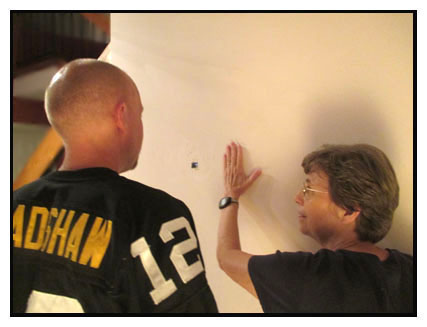
The final exercise is to find the targets without the strips, as shown in the photo below.
If they miss a target, you can ask them to try again while scanning more slowly, and/or put the strips back up and review the scanning technique to be sure they aren't missing any areas.
NOTES:
1. Before I start the training, I always ask students what kind of grid pattern they prefer to scan. Most prefer a horizontal pattern like the one explained, but some prefer to look up and down
(one preferred scanning in up-and-down columns while zig-zagging sideways in the column).
If they prefer to scan vertically, you can accommodate them by having the strips of paper horizontally at the top and bottom of the scanning area,
with the numbers on the strips spaced apart the same distance as the width of their visual field.
Then have them practice scanning from the beginning of the top strip down to the beginning of the bottom strip, then look sideways to the next number and scan back up to the first strip and so forth, following a vertical grid pattern across the wall or board.
2. When students miss the target, it can sometimes be difficult to determine if it was because they were scanning too quickly, or they weren't scanning systematically and missed some areas (or both!).
3. The slower the scan, the more detail can be seen, such as differences in texture.
Thus, targets that are easy to see can be found with a faster scan than the targets that blend in with the background and require the ability to see the small differences between the target and the background.
Training to scan (look from side to side) for vehicles at uncontrolled crossings
The following training is for students who have already learned how to maximize their vision.
For example, students with macular degeneration have learned how to use eccentric viewing, students with restricted visual fields have learned to shield their eyes from glare when needed, etc.
Also, this training should be done in situations where the students can see approaching vehicles reliably with enough warning when looking steadily in each direction.
Note that various lighting conditions can affect the ability to look for vehicles. For example, people with severely restricted visual fields may not be able to scan and find vehicles reliably at night.
This is because they have lost their peripheral vision, which is the part of our eye that we use to see contrast and movement, so that they are unable to see
anything to help them find and scan along the street;
they may literally be searching randomly in what appears to be total darkness to find any headlights of approaching vehicles.
Procedure for learning to scan at uncontrolled crossings:
Materials:
Street that has lots of instances where you can look in the direction the student is scanning and see:
no approaching vehicles;
only vehicles that are difficult for the student to see (vehicles in the distance for people with reduced acuity / central scotoma, or a vehicle near to the crosswalk for people with severely restricted visual field).
Ear plugs and/or headphones that block or mask sounds (you want to assess and develop their ability to see the vehicles -- their sound could provide a hint that they're there).
Procedure:
Before training students to scan/glance for vehicles, make sure they are able to see approaching vehicles effectively in each direction when watching steadily (without scanning).
When the student is ready to learn to scan / glance to see the vehicles, position the student facing the street.
Tell the students that you want them to face forward and, when you give them a signal, turn to the left and look, then face forward again and report whether there were any vehicles approaching.
After giving them the instructions, occlude their hearing and position yourself to watch the traffic from the left and be ready to give them the signal.
Give them the signal when either
the only vehicle(s) approaching are challenging for the student to see, or
there is nothing coming.
When you give the signal, the students should turn to look for vehicles and then look back and report whether there are any vehicles coming.
Students should look as quickly as they can without missing any cars.
Tell them if they were correct.
If a vehicle was approaching and they didn't see it, let them know that they were glancing too fast and encourage them to scan more slowly.
If the problem was that they were not visually following the line of the street, practice that skill before resuming the practice in scanning slowly.
Continue to practice until the student can reliably determine if there are any vehicles approaching.
AT TWO-WAY STREETS, IN WHICH DIRECTION DO YOU LOOK FIRST AND LAST?
For people who take longer than normal to scan or glance in each direction to determine that it is clear to cross, the situation can change drastically in one direction while they are checking in another.
For that reason, once they have determined that it is safe in all directions, it is important that the last place they look before starting to cross is toward the traffic approaching in the nearest lane, to make sure it is clear in the lane that they are about to enter.
For streets with two-way traffic in America, that means they look first to the left, and after they start to cross, they should look again to the right
because in the time that passed while looking to the left, the situation to the right may also have changed (the opposite is true in countries like Australia and Great Britain, where people drive on the left side of the road).
GLANCING TO DETERMINE SPEED AND DISTANCE OF VEHICLES:
So far, I've been talking about developing the skill of glancing / scanning to determine if there are any vehicles approaching.
Click here to find out how this exercise can be adapted to develop the skill of glancing / scanning to determine
if the approaching traffic is too close or fast to allow enough time to cross.
Since this skill uses the hearing and vision together, the training should be done WITHOUT occluding the hearing.
Training to scan for vehicles with severely restricted visual fields:What is the challenge when looking from side to side for vehicles?
May miss seeing vehicles nearby
People with severely restricted visual fields can usually see the vehicles approaching from a distance, but if they look too quickly, they may miss seeing vehicles that are near to them.
This has consequences both at signalized and uncontrolled crossings.
At uncontrolled crossings:
When looking left and right to be sure it is clear to cross in both directions, people with severely restricted visual fields may fail to see vehicles approaching nearby if they scan too quickly.
This is not usually a problem if a person misses seeing vehicles that are close to the crosswalk in the further lanes, because by the time the person reaches their lanes, those vehicles are gone.
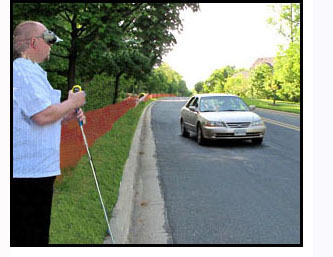
The primary concern is not being able to see approaching vehicles that are near to them in the nearest lane, in what I call the "blind spot" which is about two car lengths from the crossing (as shown in the photo to the right).
When drivers are that close to you and you start to cross because you failed to see them, the drivers may be unable to stop and avoid hitting you.
At signalized crossings:[Thanks to Dr. Gene Bourquin for this information] Pedestrians at signalized intersections need to identify where vehicles can potentially come from, and the path they might take to enter the pedestrian's crosswalk, and scan for them in an organized manner.
However a pedestrian with restricted visual fields who does a systematic scan may still miss some of the vehicles, even when looking in their direction, if she does not scan slowly enough.
The vehicles these pedestrians are most likely to miss are those that are closest to them. This means that when they are crossing with a street to their left, they are most likely to miss vehicles in that street, moving from behind them and turning right into their crosswalk.
What is the solution?
SCAN SLOWLY, AND MAKE SURE YOU ARE SCANNING ALONG THE STREET
Part of the solution is to scan more slowly. The video to the right uses two cameras to illustrate the problem and the solution at an uncontrolled crossing.
Both cameras, scanning at the same speed to look at approaching vehicles, illustrate that with normal vision the closest vehicles are easy to see with a quick glance, but it's not so easy to see those same vehicles with a restricted visual field.
Then we look at approaching vehicles with one camera scanning quickly and the other scanning slowly, showing that vehicles which are difficult to see with a quick glance are easier to see when scanning slowly.
Another factor to consider is that some students have difficulty tracking along the street accurately, and may be looking above or below where the vehicles would be. This is especially a problem at night, as I explained.
If this is a problem during the day, then before having them practice scanning slowly enough to see the vehicles, have them practice following the lines of the street, or perhaps lines that have targets along them, such as having them see objects you've placed along the edge of a parking lot or hallway.
For practice following lines nearby, I sometimes draw a thick line on a poster-sized paper, making the line loop and squiggle, with letters along the line that spell out something fun.
If they lose track of the line and accidently go to another line, they won't find the correct letters, and will need to try again.
So it is important that our students with restricted visual fields learn how to scan slowly and accurately enough to ensure that they will see if there are any vehicles approaching close in the nearest lanes.
To practice looking for right-turning vehicles at signalized crossings, use a procedure similar to the one described above:
have students stand at the corner facing forward, and turn to look and see if a vehicle is waiting in the street beside them.
If they fail to see a vehicle, have them do it more slowly until until they can consistently see any vehicle that is there.
EXAMPLES
This training process is illustrated with two examples.
The first example is shown in the video to the right, which has excerpts from videos that are copyrighted by The American Printing House for the Blind (APH) and cannot be reproduced without written permission from APH.
The video captured segments of training for Barbara, who has Retinitis Pigmentosa.
Before the training, she didn't see either of the cars approaching from the left.
That was a rather dramatic experience, and you can see that when she got the feedback and realized what happened, she improved her scanning immediately. In all the subsequent trials, she was able to see vehicles that were in the same place where she had missed them earlier.
This session was very short, taking only about 15 minutes, but apparently the lesson stuck because 4 months later, she applied her scanning skills at another street.
We were very pleased that she had retained her skill and was able to scan well enough to see all approaching vehicles reliably.
The second example is another person with Retinitis Pigmentosa, as shown in the video to the right.
I did not occlude his hearing because he is deaf (Usher syndrome).
He had the same experience that Barbara did, and missed seeing a vehicle because even though he was scanning relatively slowly, it was apparently not slow enough.
You can see that after that experience he scanned even more slowly, and was able to see other approaching vehicles reliably.
[Click here to read the narration for the introduction.]
Training to Scan and Glance for Vehicles with Central Scotoman and/or Low Acuity:
What is the challenge when looking from side to side for vehicles?
May miss seeing vehicles in the distance.
Students with a loss of acuity from macular degeneration and other conditions have difficulty seeing details such as objects that are small or far away.
Eccentric viewing can help people with macular degeneration to maximize their vision, but things are still blurry.
What is the solution?
HOLD YOUR GLANCE LONG ENOUGH TO SEE MOVEMENT:
Even with skillful use of eccentric viewing, the peripheral vision has poor acuity. However, the peripheral vision excels at detecting movement. That means that people with central vision loss may not be able to see vehicles that are parked in the distance, but they can detect them if they are moving.
So when these students look for vehicles, they need to hold their gaze long enough to notice if there is any movement, as explained in Section 4 of the Self-Study Guide, Preparing Visually Impaired Students for Uncontrolled Crossings.
The video to the right shows a simulation of what a person with low visual acuity would see and the strategy for dealing with it.
The videos below show segments of two sessions to assess and train a Deaf man with low acuity to scan reliably for vehicles.
Want to try it yourself?
If you get a few friends / colleagues together with a vision simulator, you can experience what your students need to learn.
The video to the right shows Jenn, Marc and Gina trying it at a workshop at AER's 2018 Orientation and Mobility Conference in Pittsburgh.
They are using a vision simulator made with goggles.
 Considerations of restricted visual fields
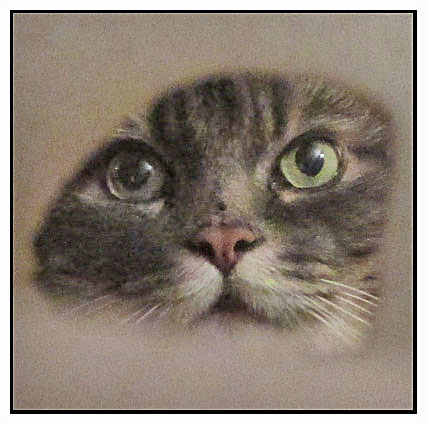


 Materials:

 NOTES:
 What is the challenge when looking from side to side for vehicles?